
A planning resource for brand and sourcing teams. Engineering recommendations are not a statement of a particular project's specification, inspection standard, price, MOQ or delivery commitment.
1. Turn the digital model into manufacturable parts
A finished character sculpt or vehicle model describes the appearance, but not necessarily the parts a factory can mold. The design must be divided into components with an assembly sequence. Mark the finished model's important views, seam locations, separate colors, fragile details and connections before committing to molds.
Design for manufacturing, or DFM, connects those decisions to wall thickness, draft and the direction each part leaves the mold. Draft is a slight taper that helps a surface release. An undercut is a feature that obstructs straight removal; changing the part split or using a moving mold section may resolve it. A printed prototype can help explain assembly, but does not prove production-material fit.
2. Engineer the injection mold and runner layout
The mold contains the negative shapes of the components, along with plastic-feed paths and provisions for cooling and ejection. Machined metal cavities reproduce the approved part geometry. The tooling plan also determines where mold seams and ejector marks can appear, so important cosmetic areas should be identified in the drawing review.
A runner frame is part of the manufacturing system, not merely packaging. Different component sizes and thin details make filling behavior important. For a kit supplied on runners, the layout must also let builders identify parts, reach attachment points with cutters and remove a component without damaging its neighbor.
| Term | Meaning | Why it matters to a kit |
|---|---|---|
| Sprue | The main feed into a conventional cold-runner mold | Builders often call the entire runner frame a sprue. |
| Runner | A channel distributing molten plastic | Its solidified frame can hold the kit's parts together. |
| Gate | The opening from the feed system into a part cavity | Its location affects filling and the mark left after cutting. |
3. Mold the parts: fill, pack, cool and eject
The injection machine heats and plasticizes the selected material. With the mold clamped shut, it pushes the melt into the cavities. Pressure is maintained during the packing stage to compensate for contraction while the plastic solidifies. After sufficient cooling, the mold opens and the ejection system releases the molded output; the cycle can then repeat.
The material grade, part geometry and mold determine the appropriate processing conditions. A setting that fills a thick section is not automatically suitable for a delicate hand, antenna or thin panel. ITTAK produces HIPS, ABS and PVC components in-house; the material assignment for a new project still needs to be established part by part.
4. Inspect trial runners and build a complete sample
Mold trials should produce evidence at both component and assembled-kit level. Check whether small features filled, surfaces carry unwanted flash or sink marks, parts distorted, and gate removal damages visible detail. Record findings against part numbers rather than relying only on a photograph of the completed model.
Then assemble a representative kit in the intended order. Examine interference, gaps, alignment, fragile connections and the instructions needed to avoid mistakes. A snap-fit design needs its own fit validation; an attractive molded part does not establish that the kit can be assembled without glue. Record approved changes and identify the sample revision used for production acceptance.
5. Finish, verify completeness and pack
The delivery format determines the remaining work. Some kits are supplied as unpainted runners; others include selected decorated components. Spray painting and Tampo Print belong in the scope only when requested. Color-separated parts are an engineering and production decision, not a guarantee that no painting will be needed.
Packing checks should connect the bill of materials to runner identifiers, loose parts, instructions and any included accessories. Protect vulnerable details and verify that the buyer receives the correct variant. Manufacturing a good individual component is not enough if the retail box lacks the parts or information needed to finish the model.
What should a brand prepare before requesting production?
Start with a non-confidential summary. If unreleased IP is involved, discuss an NDA and a suitable transfer method before sending sensitive files. Tooling cost, minimum quantities and timing require a project-specific scope; this process overview is not a production quotation.
- An overview of the model, intended size, customer and assembly experience.
- Available artwork or 3D data, clearly separating approved details from open questions.
- Expected quantity range, material or color preferences and packaging needs.
- Target sales markets, launch constraints and required approvals or documentation.
Related project evidence
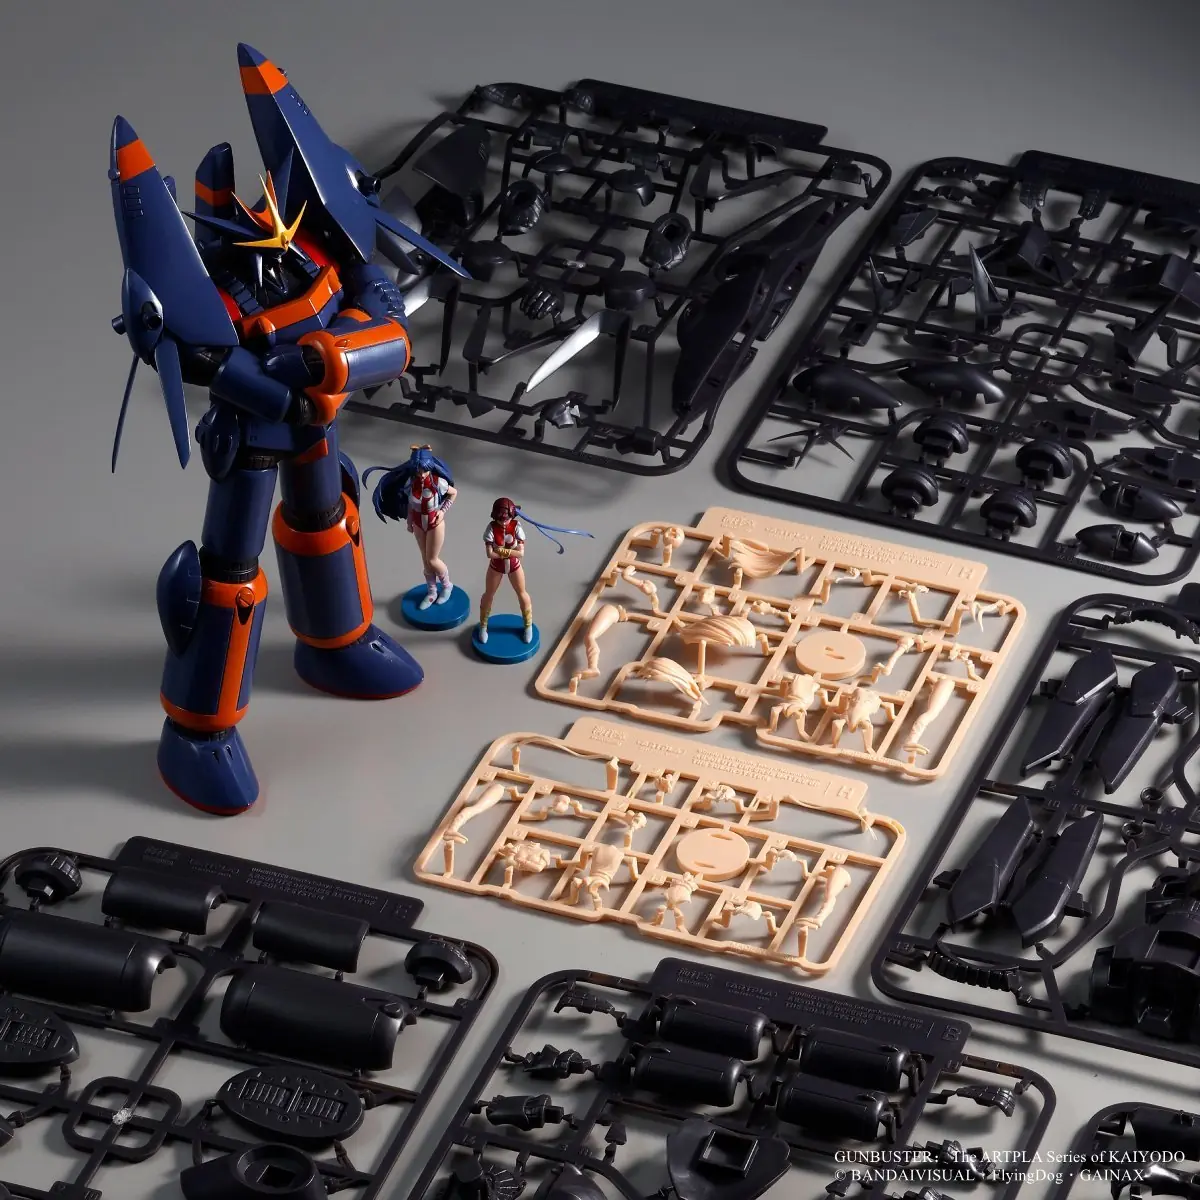
KAIYODO / ARTPLA names and images are shown with permission. The gallery illustrates the disclosed project; it is not a guarantee of specifications or test results for a new product.
Common buyer questions
Are all plastic model kits injection molded?
No. Model kits can also use cast resin, printed parts or mixed materials. This guide covers injection-molded thermoplastic kits, particularly parts delivered on runner frames; a resin casting or 3D-printing route has different tooling and production requirements.
Why are model kit parts attached to a sprue?
The frame commonly called a sprue includes channels that carry molten plastic into the part cavities. In many kits it remains attached after molding, keeping components organized until the builder removes them at the gates.
Does injection molding automatically make a kit snap-fit?
No. Glue-free assembly depends on designed connections, material behavior and verified fit between mating parts. Specify the intended assembly method before tooling and test it on molded samples.
References and further reading
- Protolabs Network: injection molding process and design guide
General reference for melting, filling, cooling, ejection and feed-system terminology; not ITTAK production parameters.
- Protolabs: gate location and gate marks
Explains why gate choices affect the molded surface and trimming; kit-specific layout still requires engineering.
- Protolabs: side-actions in mold design
Reference for straight-pull molds and features requiring additional mold movement.
Plan your next step
- Plastic model kit manufacturing service
- DFM, sprue, runner and gate design
- Model kit manufacturing cost
- HIPS, ABS and PVC material comparison
Start with a non-confidential overview. Ask about an NDA and an appropriate transfer method before sending unreleased designs.
Request a Project Review